Passing a vehicle inspection is crucial for legally driving on the road. It ensures not only your safety but also the safety of everyone else sharing the road. However, if you're unsure about the standards involved, the inspection process can feel confusing. This section clarifies these standards, explaining what inspectors look for and how you can best prepare.
Vehicle inspections usually fall into three main categories: safety, emissions, and commercial. A safety inspection focuses on your vehicle's roadworthiness. This includes checking essential components like brakes, lights, tires, and steering. Emissions inspections measure the pollutants coming from your vehicle's exhaust system. This ensures they meet acceptable environmental limits. Finally, commercial vehicle inspections have stricter requirements for trucks and other commercial vehicles. This is due to their larger size and the increased risk they pose in an accident. You can learn more about state inspections.
Regardless of the inspection type, certain vehicle elements are always closely examined. Inspectors thoroughly check brake systems, including brake pad thickness, rotor condition, and overall functionality. Lighting is another key area. They'll look for burned-out bulbs, correct alignment, and lens clarity. Tires are also assessed. Inspectors will check for adequate tread depth, proper inflation, and any signs of damage. These components are vital for vehicle control and visibility, making them essential for road safety. Inspectors will also check safety features like seatbelts, airbags, and windshield wipers.
While the core inspection elements are generally consistent, standards can change between states and regions. Some states might have tougher emissions rules than others, often due to local air quality concerns. Regulations about window tinting, tire modifications, and other vehicle customizations can also vary. Understanding these regional differences is essential for passing your local inspection.
For instance, in North America, vehicle inspections, particularly for commercial vehicles, follow strict safety and operational guidelines. The 2024 International Roadcheck, covering Canada, Mexico, and the U.S., inspected 48,761 vehicles. The results showed a 23% vehicle out-of-service rate. This means almost one in four vehicles had serious safety problems. This emphasizes the importance of thorough preparation. You can find more statistics at the 2024 International Roadcheck Results. Understanding these standards can make inspection day much less stressful. By knowing what inspectors look for, you can proactively address any potential problems, increasing your chances of a smooth, successful inspection.
Failing a vehicle inspection can be incredibly frustrating, especially when the problems are easily preventable. This section explores common reasons vehicles fail inspections and provides practical advice on how to avoid these issues. By understanding these common breaking points, you can focus your pre-inspection preparations and improve your chances of passing on the first try.
Many inspection failures originate from problems with the brake system. Inspectors thoroughly evaluate brake pad thickness and rotor condition. Uneven braking or worn-out components can result in an immediate failure. Lighting deficiencies are another common oversight. Burned-out bulbs, poorly aligned headlights, or cracked lenses can all contribute to a failed inspection. Tires are also a frequent problem area. Inspectors use tread depth gauges to confirm that tires meet the legal minimum requirements for safe driving.
The infographic above depicts a mechanic inspecting tire tread depth and brake caliper condition, highlighting two critical aspects of a vehicle inspection. These checks demonstrate the precise standards and measurements used to ensure vehicle safety.
In addition to these core components, emissions systems are increasingly important. Many jurisdictions require vehicles to pass emissions tests, measuring the pollutants released into the atmosphere. Inspectors also meticulously check various safety equipment components, such as seat belts, airbags, and windshield wipers. A malfunctioning safety device can lead to a failed inspection. Most states mandate periodic safety and emissions checks. Learn more about state inspection requirements.
Real-world data reveals valuable insights into common vehicle inspection failure points. For example, a recent military vehicle inspection study conducted in Germany in April 2025 revealed a 32% failure rate among nearly 2,000 inspected vehicles. Brake problems, lighting issues, and unauthorized window tinting were among the leading causes of failure. Learn more about common vehicle inspection failures. This data emphasizes the importance of thorough preparation before an inspection.
To help you prepare, we've compiled a table summarizing the top ten vehicle inspection failure causes:
Top 10 Vehicle Inspection Failure Causes
| Failure Cause | Percentage of Failures | Typical Repair Cost Range | DIY Difficulty Level |
|---|---|---|---|
| Brake System Issues | 25% | $100 – $500 | Medium |
| Lighting Problems | 20% | $20 – $200 | Easy |
| Tire Issues | 15% | $50 – $300 | Easy to Medium |
| Emissions Problems | 10% | $50 – $1000 | Medium to Hard |
| Windshield Wipers | 8% | $20 – $50 | Easy |
| Safety Equipment Malfunctions | 7% | $50 – $500 | Varies |
| Suspension Problems | 5% | $100 – $500 | Hard |
| Steering System Issues | 4% | $100 – $1000 | Hard |
| Exhaust System Issues | 3% | $50 – $500 | Medium |
| Window Tint Violations | 3% | $50 – $200 | Easy |
This table provides a general overview; specific percentages and costs can vary. However, it highlights the most frequent issues encountered during vehicle inspections.
By understanding these common failure points, drivers can better prepare their vehicles for inspection and avoid unnecessary expenses and delays.
By understanding the criteria inspectors use, you can proactively address potential problems. This includes regularly checking your brakes, lights, and tires and confirming that all safety equipment is functioning correctly. Staying informed about state-specific regulations, such as window tinting laws, can also prevent unexpected issues during the inspection. Regular maintenance is not only crucial for passing your inspection but also for ensuring your vehicle is safe and reliable on the road. This proactive approach will save you time, money, and frustration in the long run.
Passing your vehicle inspection shouldn't be a gamble. Instead of crossing your fingers and hoping for the best, take charge with this comprehensive pre-inspection checklist. Developed with seasoned mechanics, this checklist covers all the crucial systems inspectors scrutinize. We'll walk you through evaluating your brakes, lights, tires, emissions, and safety equipment, just like the pros.
Check Brake Pad Thickness: Grab a ruler and measure your brake pads. Most states mandate a minimum thickness of 1/4 inch. If your pads measure less, they're due for a change.
Inspect Rotors: Carefully examine your rotors for deep grooves or excessive rust. These can lead to uneven braking and will likely require a mechanic's expertise.
Test Brake Pedal Feel: Pay attention to how your brake pedal feels. Does it feel spongy or depress too low? This could indicate issues with your brake lines or master cylinder.
Addressing brake problems head-on is crucial for a successful inspection. These simple checks can prevent a surprising and expensive rejection.
Test All Lights: Systematically test all your lights, including headlights (high and low beams), taillights, brake lights, turn signals, and hazard lights. Don't wait – replace any burned-out bulbs right away.
Inspect Light Lenses: Check your light lenses for cracks or cloudiness. These imperfections can diminish light output and may need replacing to pass inspection.
Verify Headlight Alignment: Make sure your headlights are properly aligned. Misaligned headlights can blind oncoming drivers and are a frequent cause of inspection failures.
Even a minor issue like a burned-out taillight can result in a failed inspection, making thorough checks absolutely essential. This attention to detail can save you a return trip to the inspection station.
Measure Tread Depth: The penny test is a quick way to check your tread depth. If you can see all of Lincoln’s head, your tires are worn out and need replacing. Most states require at least 2/32 inch of tread.
Check Tire Pressure: Proper inflation is key. Use a tire pressure gauge to ensure all tires are inflated to the recommended pressure, which you can find on the sticker inside your driver's side doorjamb. Uneven tire pressure can negatively impact handling.
Inspect for Damage: Thoroughly examine your tires for cuts, bulges, or any other visible damage on the sidewalls and tread. Any damage requires a professional assessment.
Don't forget about your spare tire, especially if it's externally mounted. For a comprehensive car maintenance guide, check out this helpful resource: How to master your car maintenance.
Check Warning Lights: Be sure to address any illuminated dashboard warning lights, especially the "check engine" light. These often lead to an automatic inspection failure.
Inspect Exhaust System: Visually inspect your exhaust system for any leaks or damage to the pipes and muffler.
Test Safety Equipment: Ensure all seatbelts buckle securely, airbags are functional (no warning lights), and your windshield wipers are working effectively.

Being proactive and addressing these potential problems before your inspection can save you time, money, and the frustration of a failed inspection. Early detection and prompt repairs contribute to a smoother, more successful inspection experience.
To further assist you in preparing for your vehicle inspection, we've compiled a detailed checklist. This table outlines key areas to inspect and the criteria for passing, along with recommended maintenance if any issues are found.
Vehicle Pre-Inspection Maintenance Checklist: A comprehensive checklist of items to inspect and maintain before your vehicle inspection, organized by system and priority level.
| System | What to Check | Pass Criteria | Maintenance Required If Failing | DIY Possible? |
|---|---|---|---|---|
| Brakes | Brake pad thickness | Minimum 1/4 inch | Replace brake pads | Yes, with proper tools and experience |
| Brakes | Rotors | No deep grooves or excessive rust | Resurface or replace rotors | Typically requires professional service |
| Brakes | Brake pedal feel | Firm, no sponginess or excessive travel | Inspect brake lines, master cylinder | May require professional service |
| Lights | Headlights, taillights, brake lights, turn signals, hazards | All lights functioning | Replace bulbs | Yes |
| Lights | Light lenses | No cracks or cloudiness | Replace lenses | Yes |
| Lights | Headlight alignment | Correctly aimed | Adjust headlights | Yes, but professional alignment recommended |
| Tires | Tread depth | Minimum 2/32 inch | Replace tires | Yes |
| Tires | Tire pressure | Correct pressure as listed on doorjamb sticker | Inflate tires | Yes |
| Tires | Sidewalls and tread | No cuts, bulges, or damage | Replace tires | Yes |
| Emissions | Check engine light | Not illuminated | Diagnose and repair underlying issue | May require professional service |
| Emissions | Exhaust system | No leaks or damage | Repair or replace exhaust components | May require professional service |
| Safety | Seatbelts | Functioning buckles | Replace faulty seatbelts | May require professional service |
| Safety | Airbags | No warning lights | Diagnose and address airbag system issues | Requires professional service |
| Safety | Windshield wipers | Effective operation | Replace wiper blades | Yes |
This checklist empowers you to take control of your vehicle's condition and significantly increases your chances of a successful inspection. By addressing these items beforehand, you can avoid unexpected expenses and the inconvenience of a failed inspection.
Passing your vehicle inspection isn't a universal process. Your car's age plays a significant role in the preparation required. Like us, cars develop different issues as they get older, needing specific care. Understanding how preparation changes with your vehicle's age is key to a successful inspection.
As vehicles age, certain systems are more prone to wear and tear. Rubber components, like belts and hoses, become brittle and susceptible to cracks and leaks. Brake lines can corrode, potentially causing brake failure. This means an older car needs different maintenance priorities than a newer one.
Data reveals important trends. In Germany, over 10% of five-year-old passenger vehicles had serious defects during inspections. This number rose to over 31% for vehicles older than nine years. This data, from 1987 to 2005, highlights the increasing importance of maintenance as vehicles age. Learn more at this insightful resource on vehicle inspection statistics.
Cars over five years old often show wear in their suspension. Before your inspection, use a thorough checklist, like a vehicle inspection checklist, to examine these areas. Also, ensure your brakes work correctly and your tires have enough tread depth. Addressing these common issues boosts your chances of passing.
Vehicles over ten years old need extra attention on their exhaust systems. Rust and corrosion can cause leaks and inspection failure. Inspect all rubber components, like hoses and belts, as they deteriorate with age.
For vehicles over 15 years old, a pre-inspection check by a qualified mechanic is highly recommended. This proactive approach can catch potential problems you might miss, allowing for preventative maintenance and a smoother inspection process.
Preparing a vintage car differs greatly from preparing a modern one. Vintage cars might not have the same emissions standards but are still subject to safety checks. Modern vehicles, with complex electronics and Advanced Driver-Assistance Systems (ADAS), present new challenges. Modern inspections often include Onboard Diagnostic (OBD) system checks and might require calibration of sensors and cameras. Understanding your vehicle's specific needs, based on its age and technology, is crucial for a successful inspection.
Passing your vehicle inspection requires some important decisions. One of the biggest is whether to prepare your vehicle yourself or hire a professional. This section offers a practical framework for making the right choice. We’ll consider costs, benefits, and common vehicle issues. The goal is to maximize your chances of passing while respecting your budget and skills.
The first step is honestly evaluating your mechanical abilities and resources. Do you have basic tools like a tire pressure gauge, a wrench set, and a jack? Are you comfortable with tasks like changing light bulbs or checking fluid levels? If you aren't mechanically inclined or lack basic tools, some DIY preparations might be more trouble than they're worth.
Checking your tire pressure is an easy DIY task that can prevent inspection failure. Replacing burned-out bulbs is also usually straightforward. However, more complex issues like brake repairs often require specialized tools and knowledge. In these cases, professional help is a wiser choice. You might be interested in: How to master brake repairs.
Next, consider the costs and potential savings of each approach. DIY can save on labor costs. But improperly executed repairs can cost more in the long run. For example, using the wrong parts or making a mistake during a brake job could create safety issues. These might require costly professional correction.
Professional service has upfront costs. But it often includes guarantees and warranties. This provides peace of mind and protection against unexpected problems. A professional mechanic can quickly diagnose and fix problems that might stump a DIYer. This saves you time and potentially prevents further vehicle damage.
Many mechanics stress that checking fluids, lights, and tire pressure should be routine DIY maintenance. These checks are inexpensive and can prevent many inspection failures. However, mechanics often see DIYers trying complex repairs that need special equipment and skills. This can lead to improper repairs, creating safety hazards and higher repair costs.
By weighing your skills, resources, and the potential costs and benefits, you can create a personalized approach to vehicle inspection preparation. This could involve handling basic maintenance yourself and leaving complex issues to the professionals. Or, if you're comfortable with advanced repairs, you could tackle more tasks yourself.
The key is to make informed decisions that maximize your inspection passing chances. Consider your budget and skill level. This strategic approach can save time, money, and the frustration of a failed inspection. A successful inspection ensures legal compliance and the safety of everyone on the road.
Today's vehicles are brimming with technology, from sophisticated engine computers to advanced safety features. This creates unique challenges for vehicle inspections that simply didn't exist a few years ago. Understanding how these systems are tested is key to a smooth inspection process.
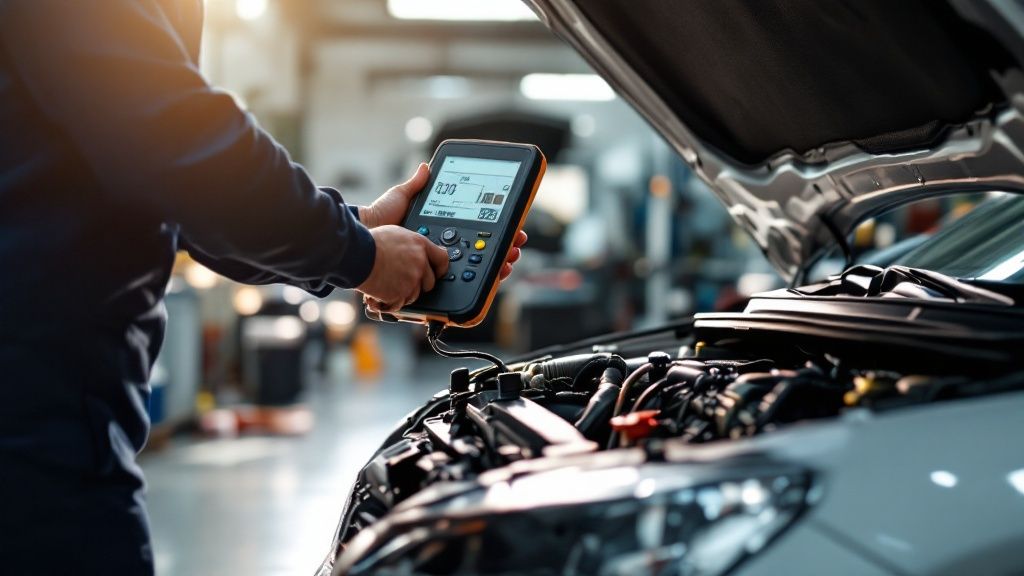
On-board diagnostic (OBD) systems function as your car's internal monitoring system. They continuously track various components and log diagnostic trouble codes (DTCs) if a problem arises. During an inspection, technicians use an OBD-II scanner OBD-II Scanner to access these codes, which can pinpoint potential issues with the engine, transmission, emissions system, and other key parts. Any illuminated dashboard warning lights, particularly the check engine light, are often an automatic red flag during an inspection. Addressing these warnings promptly is vital for a successful inspection.
Many modern vehicles now include advanced driver-assistance systems (ADAS), such as lane departure warning, adaptive cruise control, and automatic emergency braking. These systems rely on cameras, radar, and other sensors that require precise calibration. Inspectors often verify proper ADAS function and alignment. Calibration problems can lead to system malfunctions and subsequent inspection failures.
Hybrid and electric vehicles have their own unique inspection requirements. In addition to standard safety checks, these inspections might include evaluating the high-voltage battery health and the charging system. Specialized emissions tests also apply to hybrids, with a focus on their specific powertrain designs. This highlights how vehicle inspections are evolving to keep pace with automotive advancements.
Getting your modern vehicle ready for inspection requires a comprehensive approach. Addressing any dashboard warning lights immediately is paramount. Regular maintenance and software updates for your vehicle's computer systems are also important preventative measures. For vehicles equipped with ADAS, confirming correct sensor calibration is essential. Hybrid and electric vehicle owners should ensure their battery and charging systems are in good working order. This proactive preparation will help you confidently navigate the complexities of modern vehicle inspections.
Failing a vehicle inspection can be frustrating, but it's definitely not the end of the road. With a little planning and effort, you can address the issues and get your vehicle back in compliance. This guide offers practical steps to navigate the process, from understanding the inspection report to managing repairs.
The first step after a failed inspection is to understand the reasons behind it. Your inspection report provides detailed information on the specific areas that didn't meet the required standards. Carefully review the descriptions of each problem. This understanding will help you prioritize necessary repairs and avoid unnecessary expenses. For instance, "worn brake pads" is a straightforward fix, while "brake system imbalance" might require further diagnosis.
Once you understand the issues, prioritize the repairs based on safety concerns. Problems like severely worn brakes or faulty lights are immediate safety hazards and should be addressed right away. Less critical issues, such as a small crack in the windshield, can be scheduled later. This approach ensures your safety and creates a more manageable repair timeline.
Most areas give you a specific time frame, usually 30 to 90 days, for retesting after a failed inspection. Know your local regulations and the retest window. Some jurisdictions offer reduced fees or waivers for retests within a certain period. If your vehicle needs extensive repairs, look into temporary permit options that allow you to drive legally while you're getting the work done. Being aware of these details can save you time and money.
If you're facing multiple repairs, getting everything fixed at once can strain your budget. If you have budget limitations, prioritize essential safety-related repairs first. Other, less urgent repairs can be addressed as your budget allows. It's always a good idea to discuss your plan with your mechanic. They can offer guidance on the safest and most cost-effective way to proceed. For example, worn tires and a minor exhaust leak might be less urgent than a brake problem. This allows you to be both safe and financially responsible.
A failed inspection doesn't have to be a major setback. By understanding the report, prioritizing repairs strategically, and knowing local regulations, you can turn the situation around and get your vehicle back on the road. This process reduces stress and ensures your car is safe and legally compliant. Ready to get your car in top shape and pass inspection? Visit Kwik Kar Oil Change and Auto Care for expert service. Our skilled technicians can help you maintain your vehicle and get you back on the road safely and efficiently.